Designing a kitchen on a budget (Part 1 of 2)
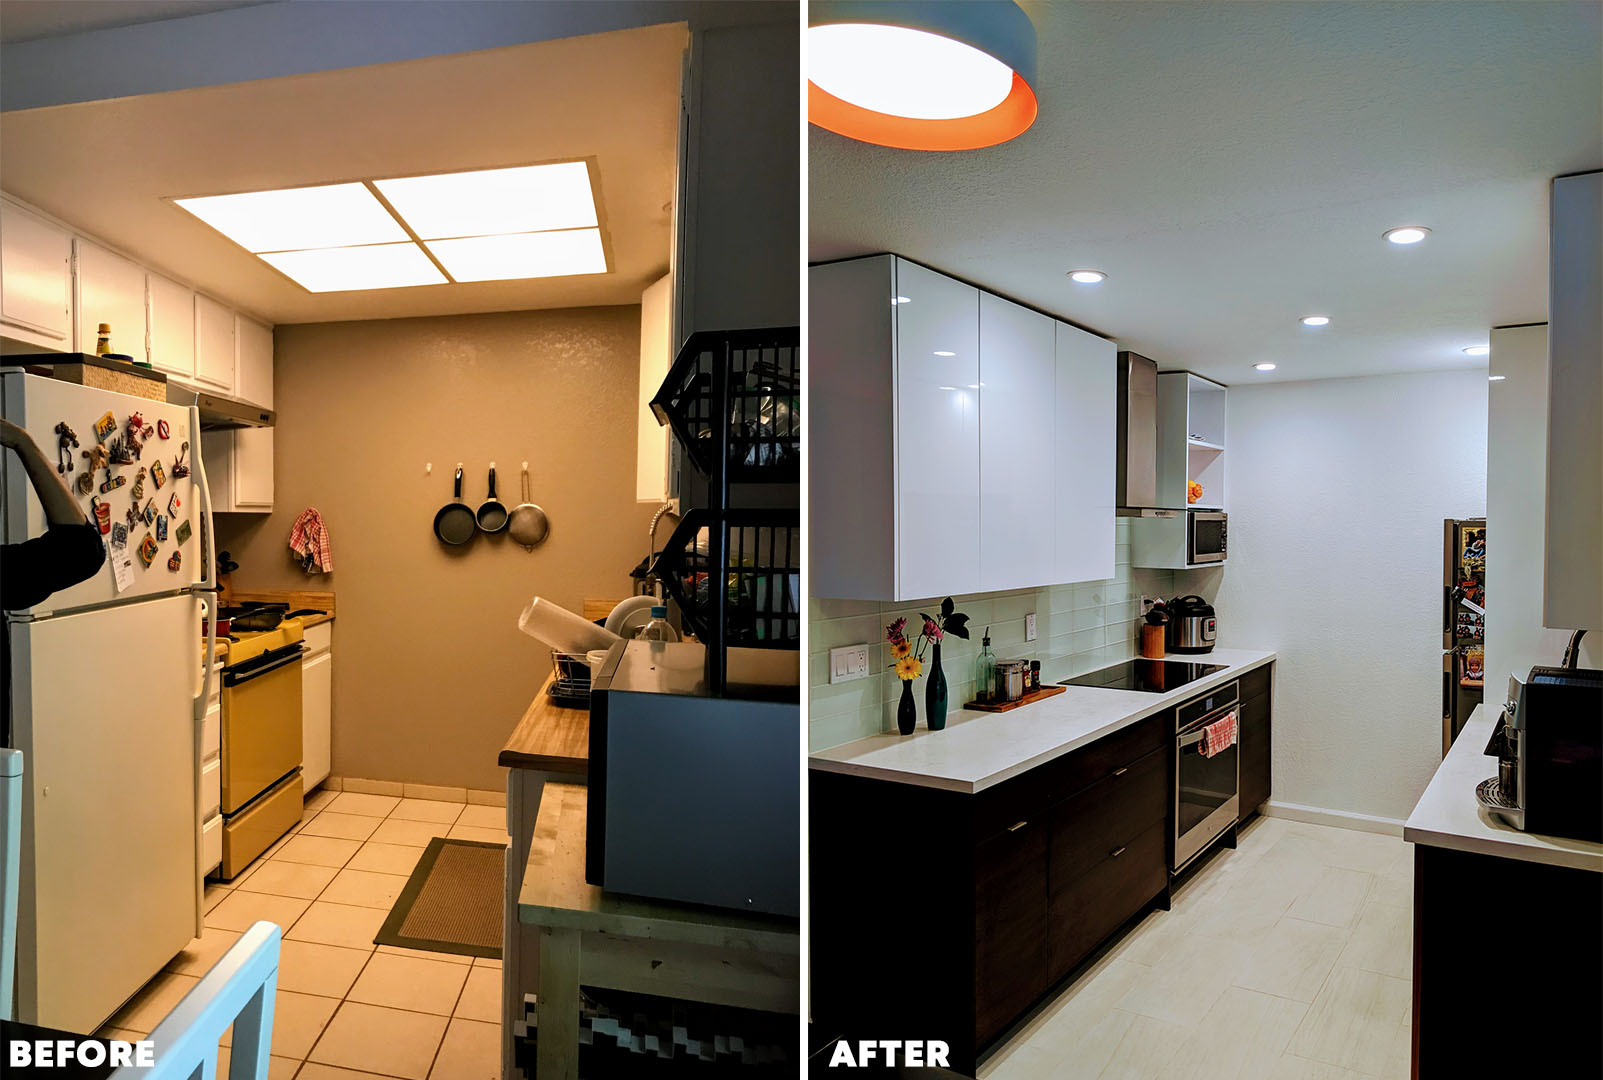
I’ve been writing and re-writing this post for a few weeks now and I’m so excited to FINALLY share the process of how I helped a client renovate her apartment’s kitchen! You’ll be astonished at the big change in the photos below and I’m happy to report the clients love their new kitchen :).
Although I have a ton of experience designing corporate interiors, this was my first residential project. And I’m glad it was a kitchen because they're quite challenging - a ton of functions in a small space!
If you follow me on Facebook you may have seen sneak peaks of the remodeling process here, here and here! I promise to share a lot more pictures in Part 2 of this post (including details of paint colors, tiles, cabinets etc) but for this post I wanted to focus on how I went about tackling this project from start to finish.
I’ve included the inspiration images, sketches, design drawings etc. that led us to the final design in the hope it’ll give you a glimpse into the process of an interior designer (mine anyway!) and inspire you in your own renovation project.
Design Direction
It’s important to note that this is my client’s first apartment and they may not live here forever. Hence our aim was a budget friendly kitchen which they could enjoy for now while also increasing the value of their apartment for a future sale. This was something we kept in mind throughout the design process whether it was the new layout, selection of finishes and appliances or selecting a contractor.
1) Initial consultation
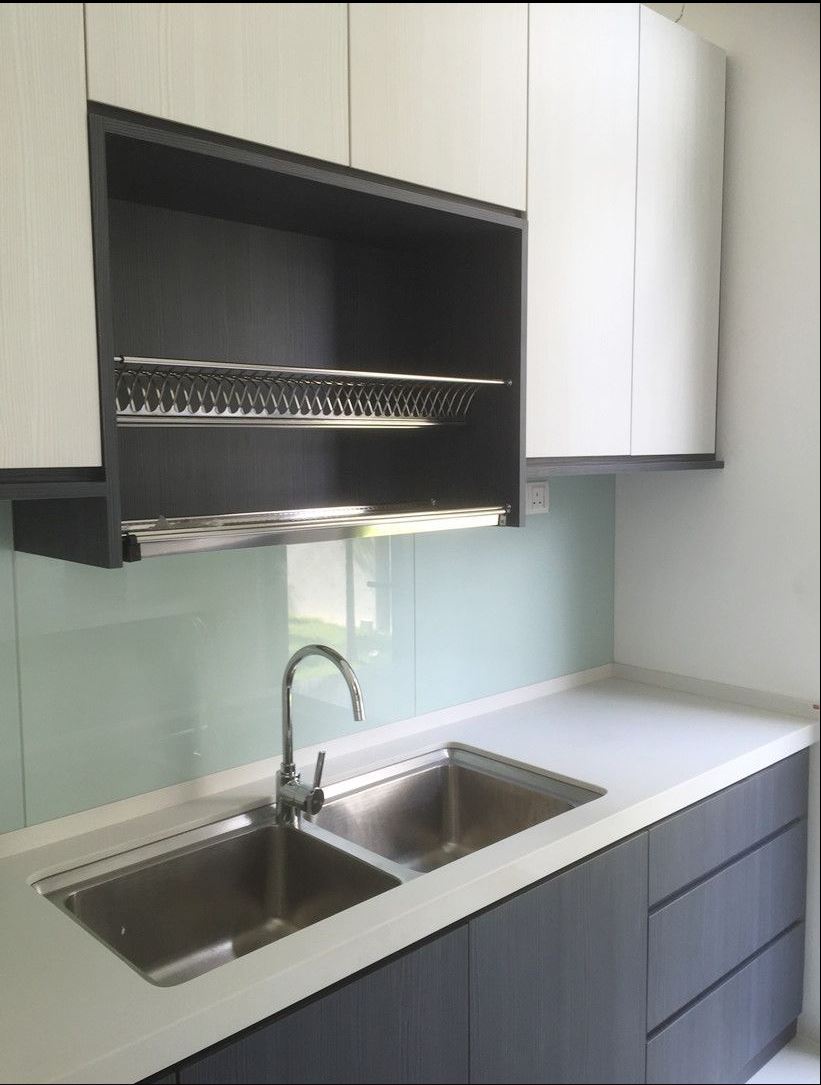
The first meeting was simply about getting to know the client and understanding what her needs were. We chatted to figure out what she thought wasn’t working for her in the space (which was everything!) and you’ll see why in the “Before” photos below. We also spoke about their expectation for the renovation budget so we would all be on the same page about design decisions.
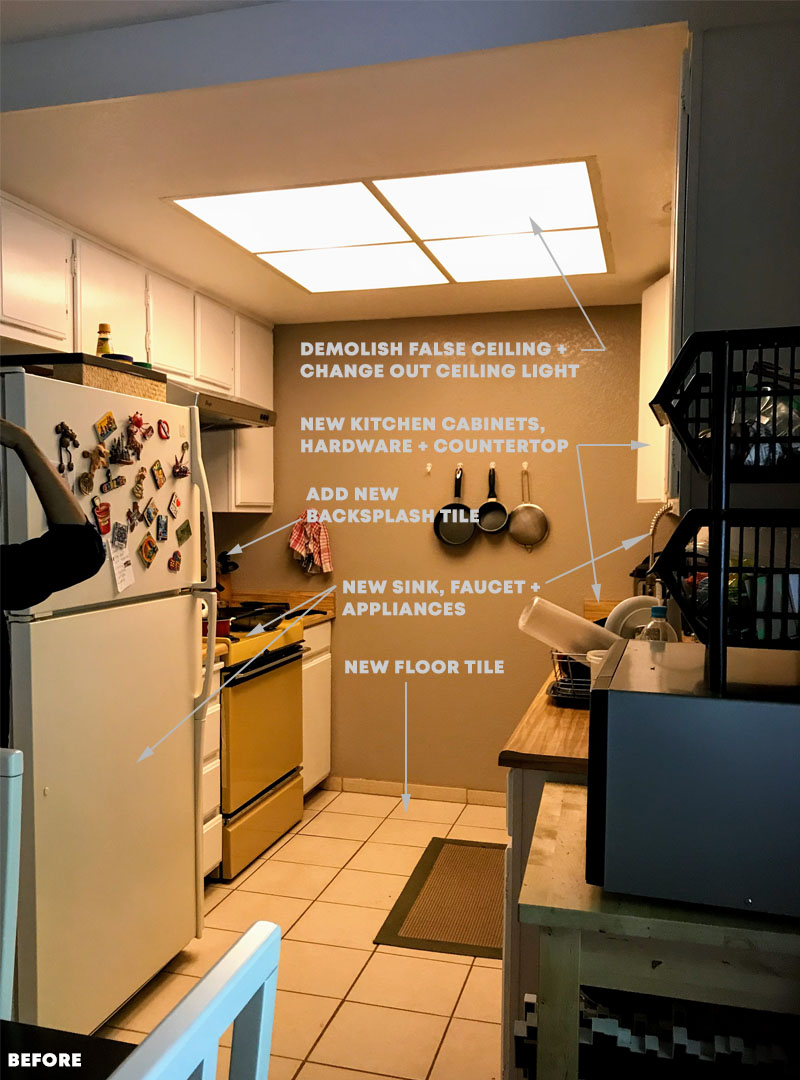
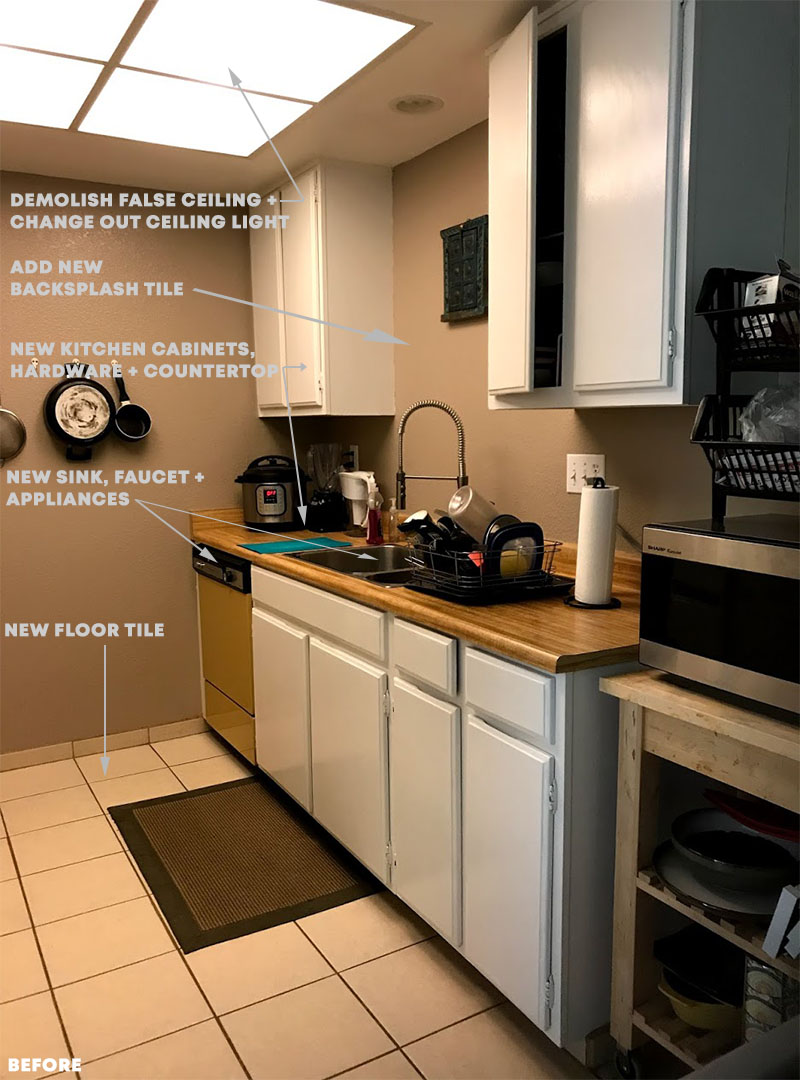
She also shared kitchen inspiration images she liked with me – which were super helpful for me to understand her aesthetic. As you can see from the image below she was leaning towards a modern, light filled kitchen with clean lines which the original clearly wasn’t.
After this the client was excited to start the design process ASAP so I drew up a contract and we quickly got down to business!
2) Measurements/Photos
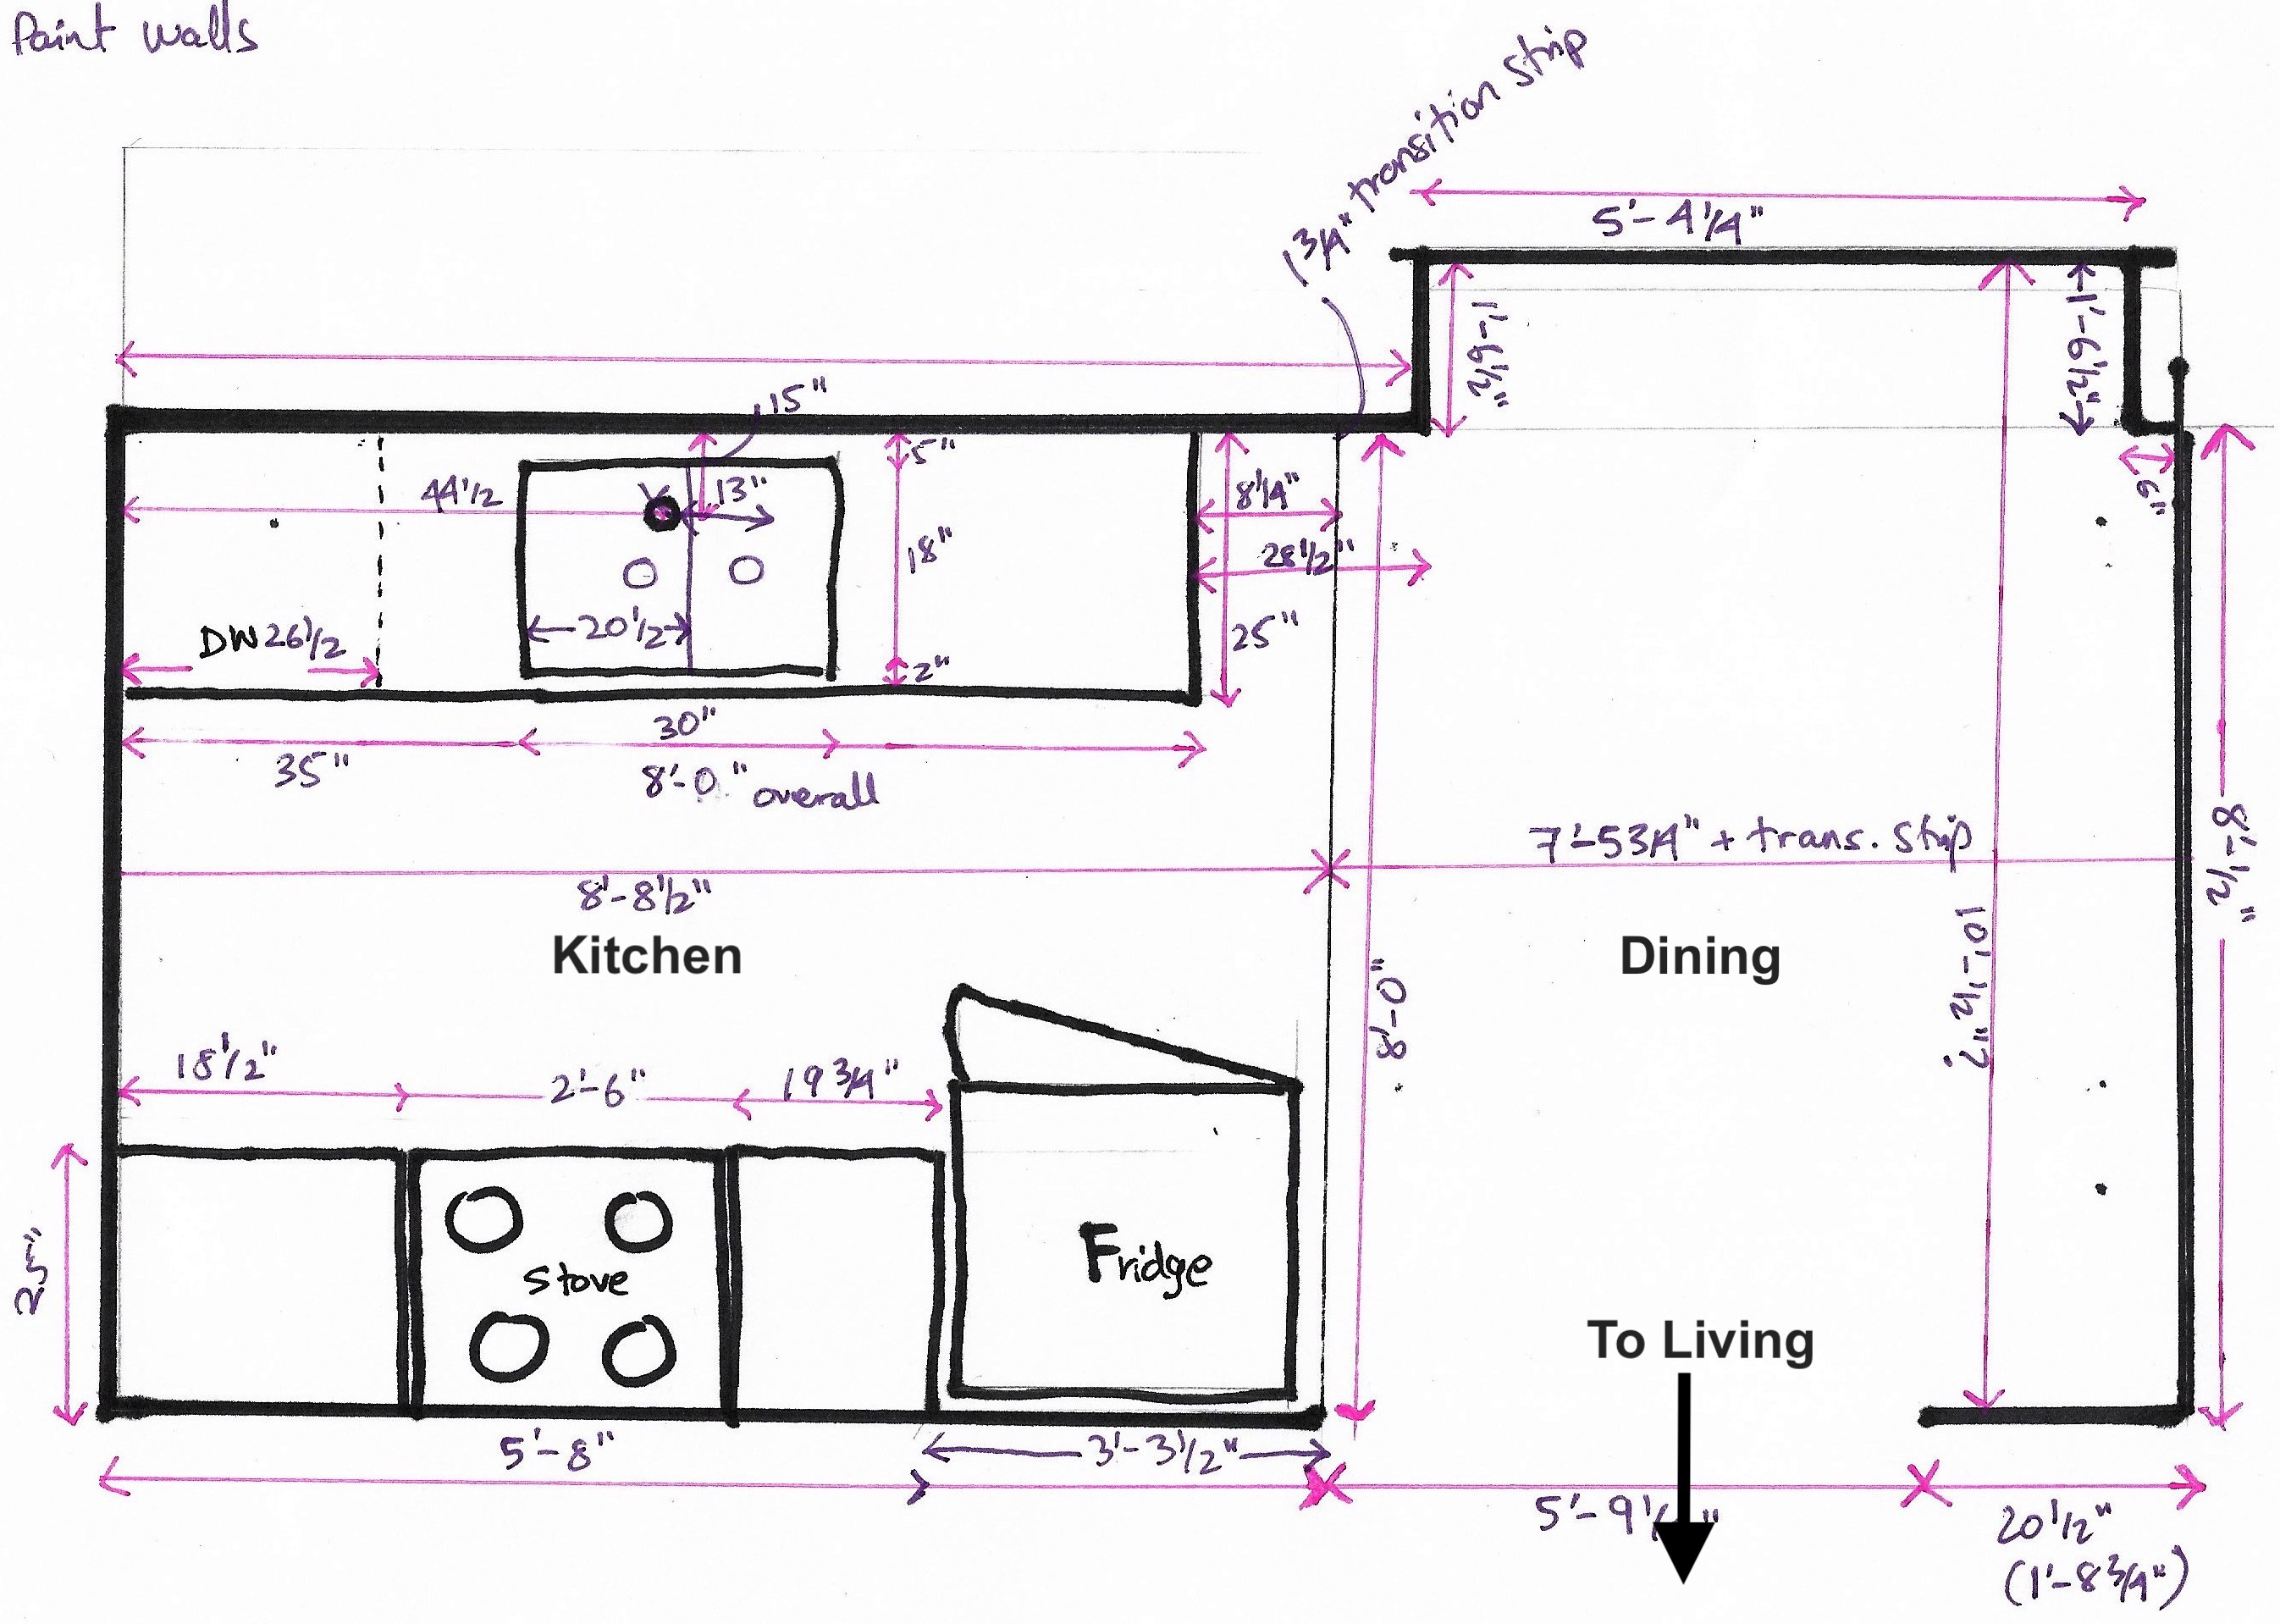
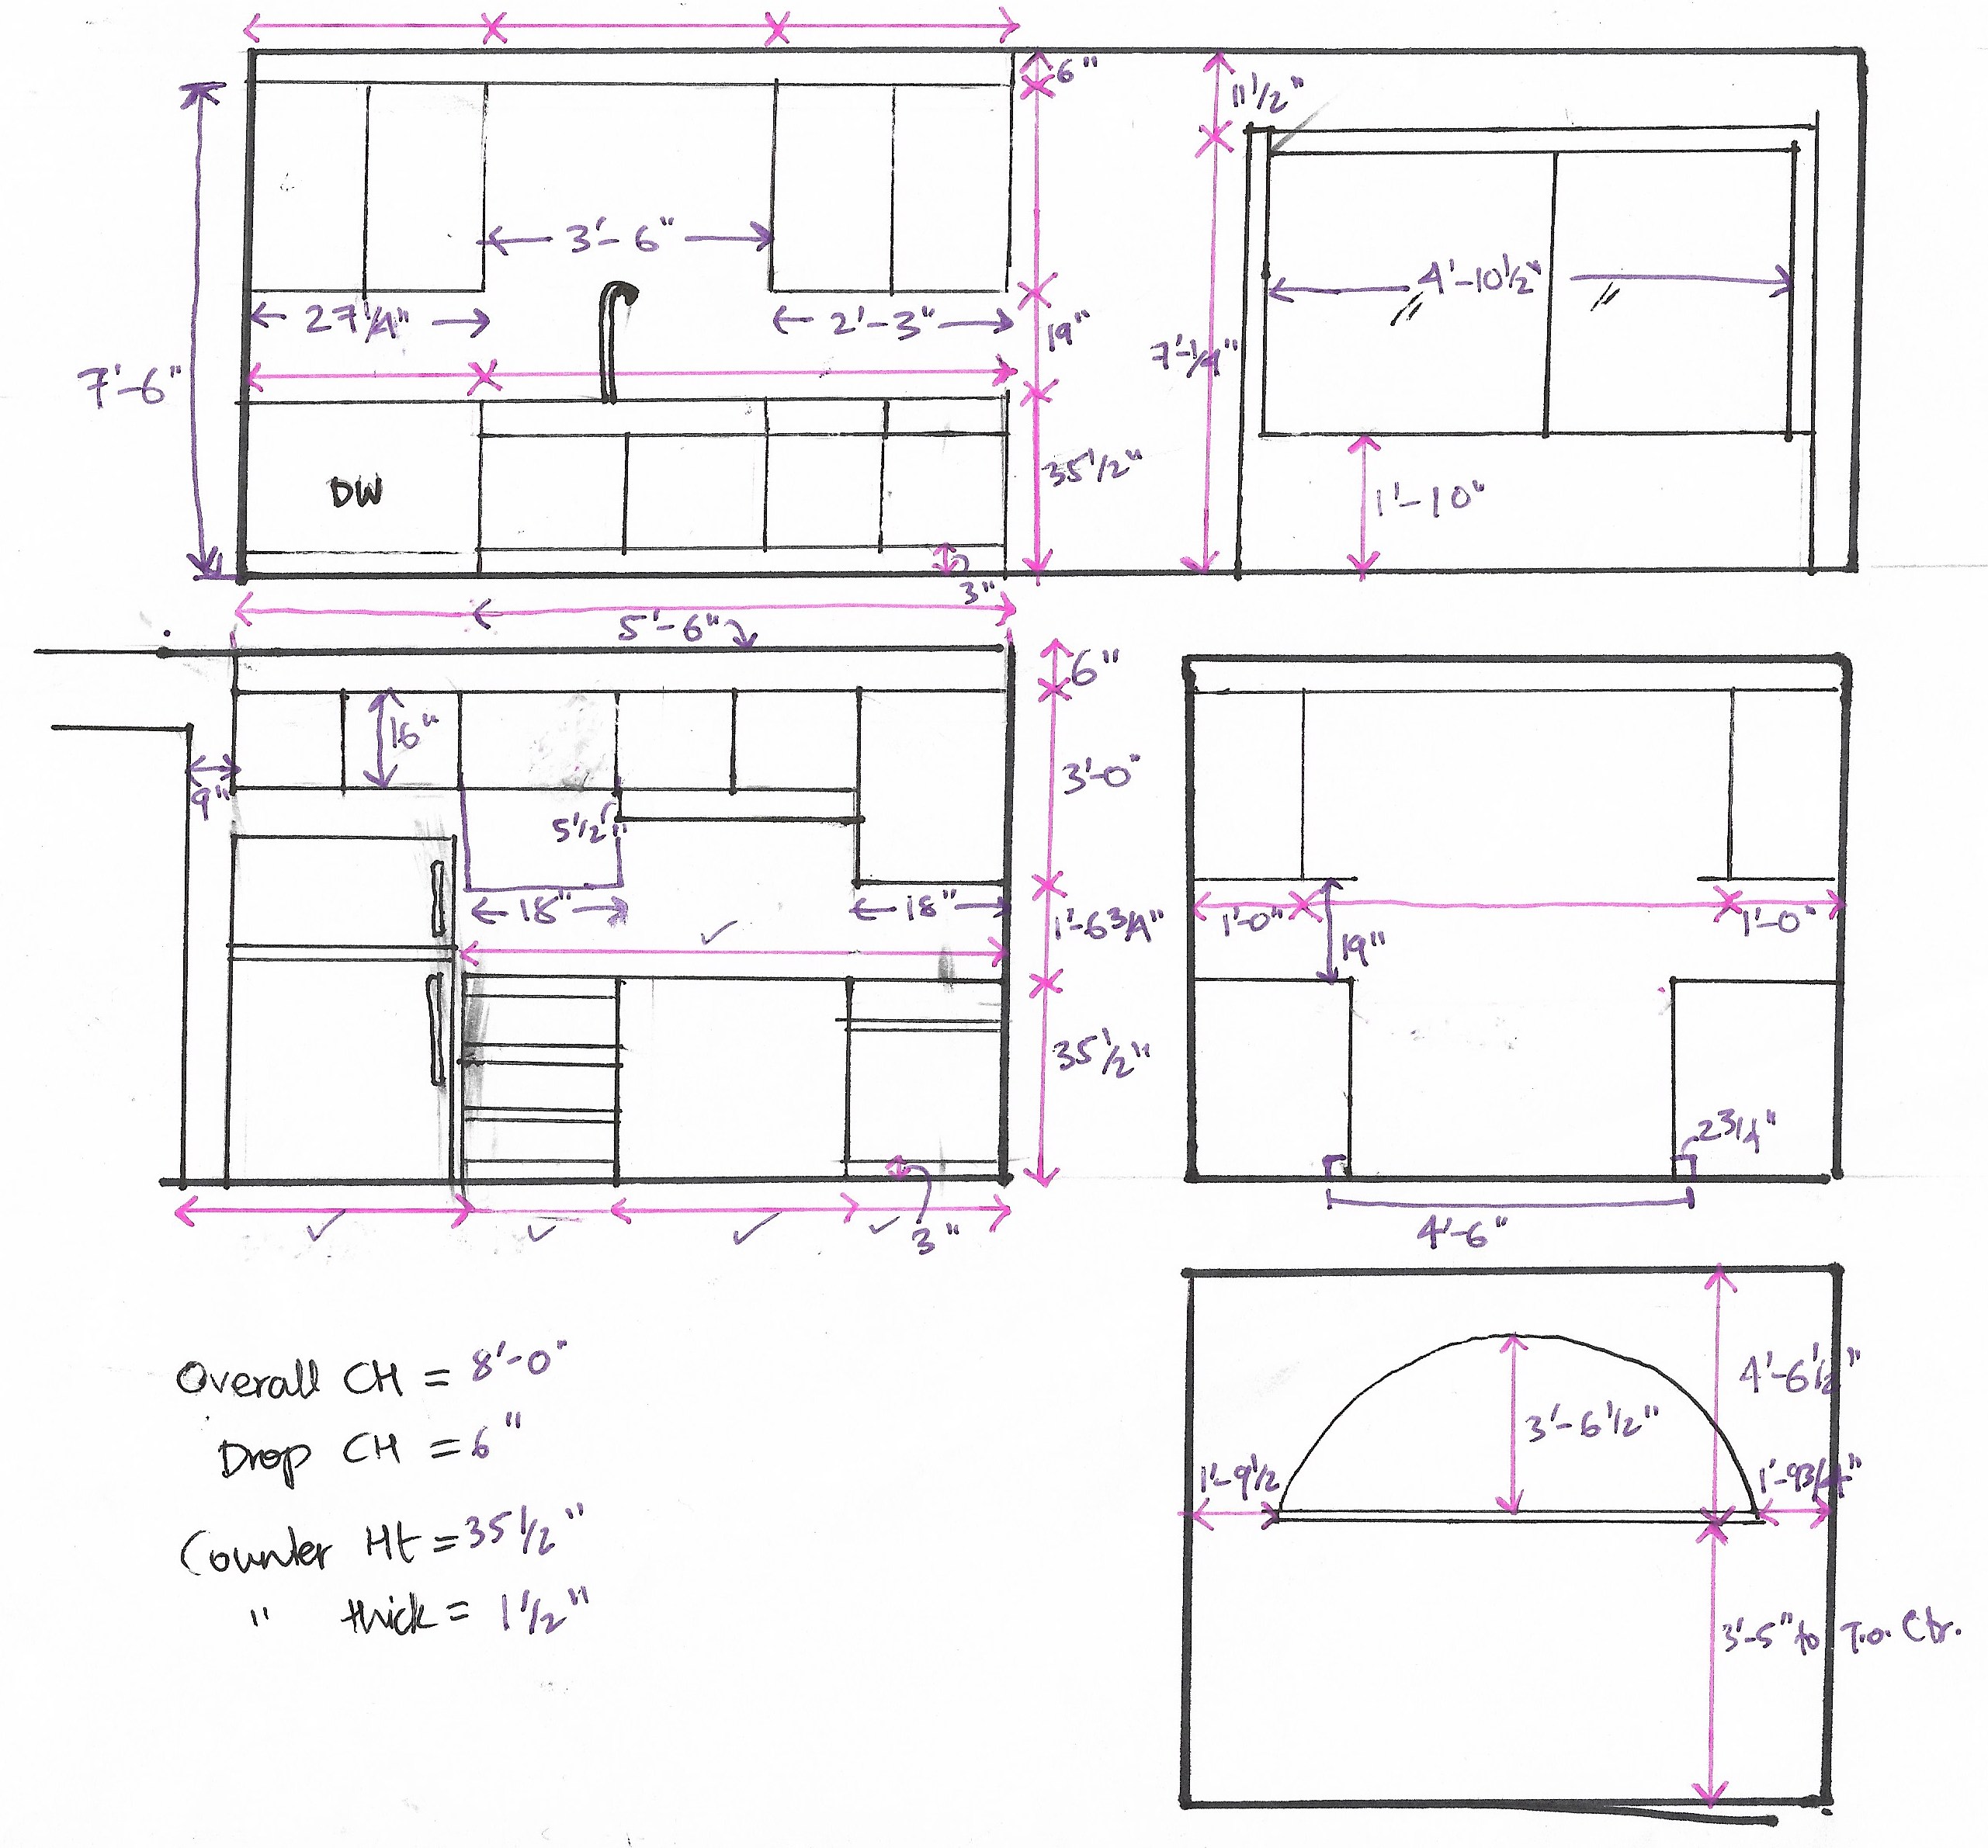
This is one of the most important and often overlooked parts of the renovation process - especially if you’re renovating yourself. It’s very important to measure the space you’re about to design thoroughly and take tons of pictures to reference later because you’ll need it during the design as well as construction part of the project. I learned this the hard way during my corporate design years so just trust me on this! See my rough sketches above and below for what I mean when I say measure “thoroughly” ;)!
3) New Layout
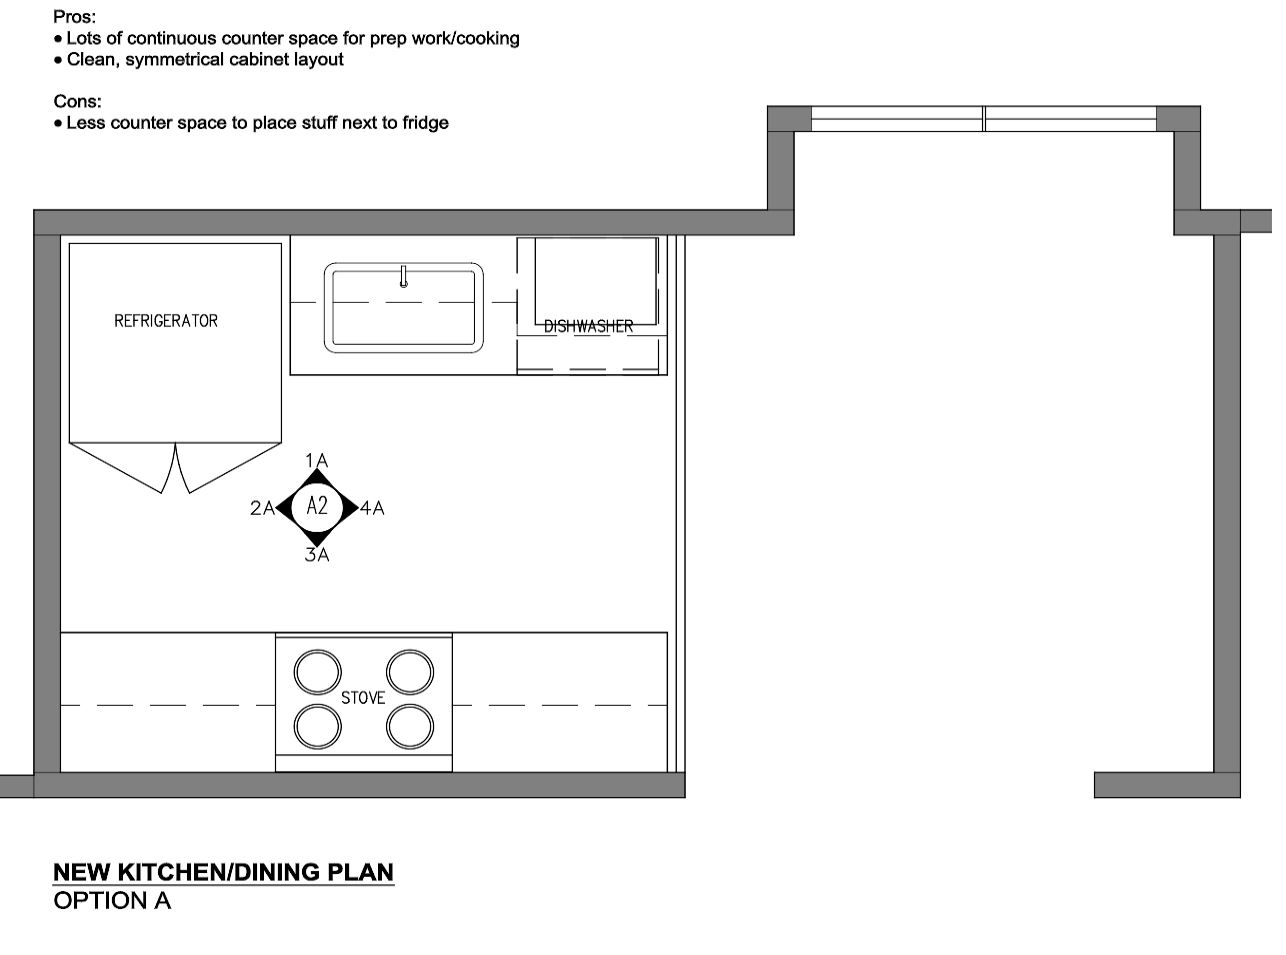
Here comes the fun part! Now that I had all the info I needed, I drew up the kitchen to scale using a software called AutoCAD and came up with a couple of options for the new kitchen.
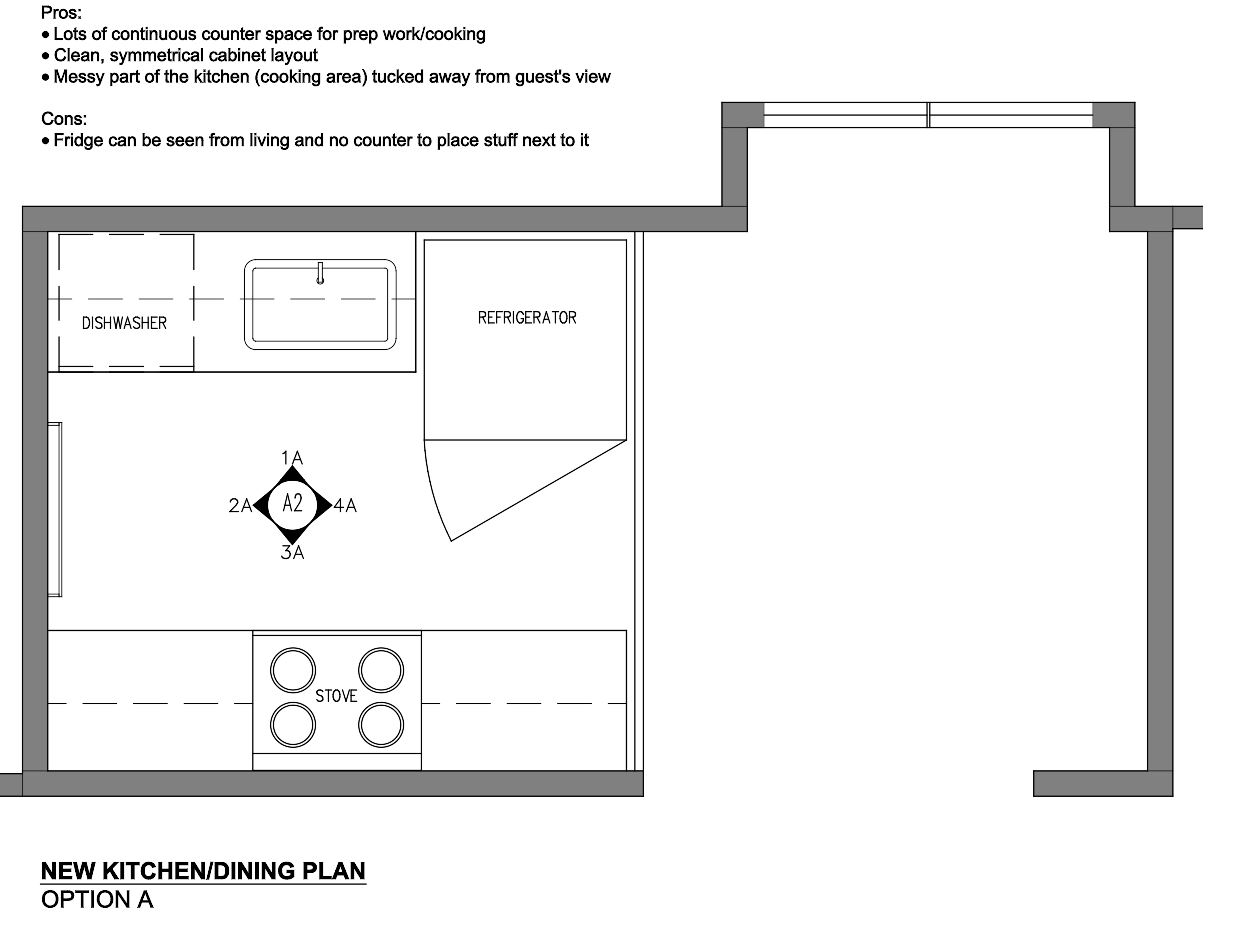

We chose the layout below as it didn’t make any major changes to the location of existing plumbing/gas connections while also making the flow a lot more functional. Also, since the size of the kitchen was only about 70sf there were only so many ways we could move the refrigerator/oven/sink to keep the kitchen functional. The final layout works for the client and I’m happy about that!
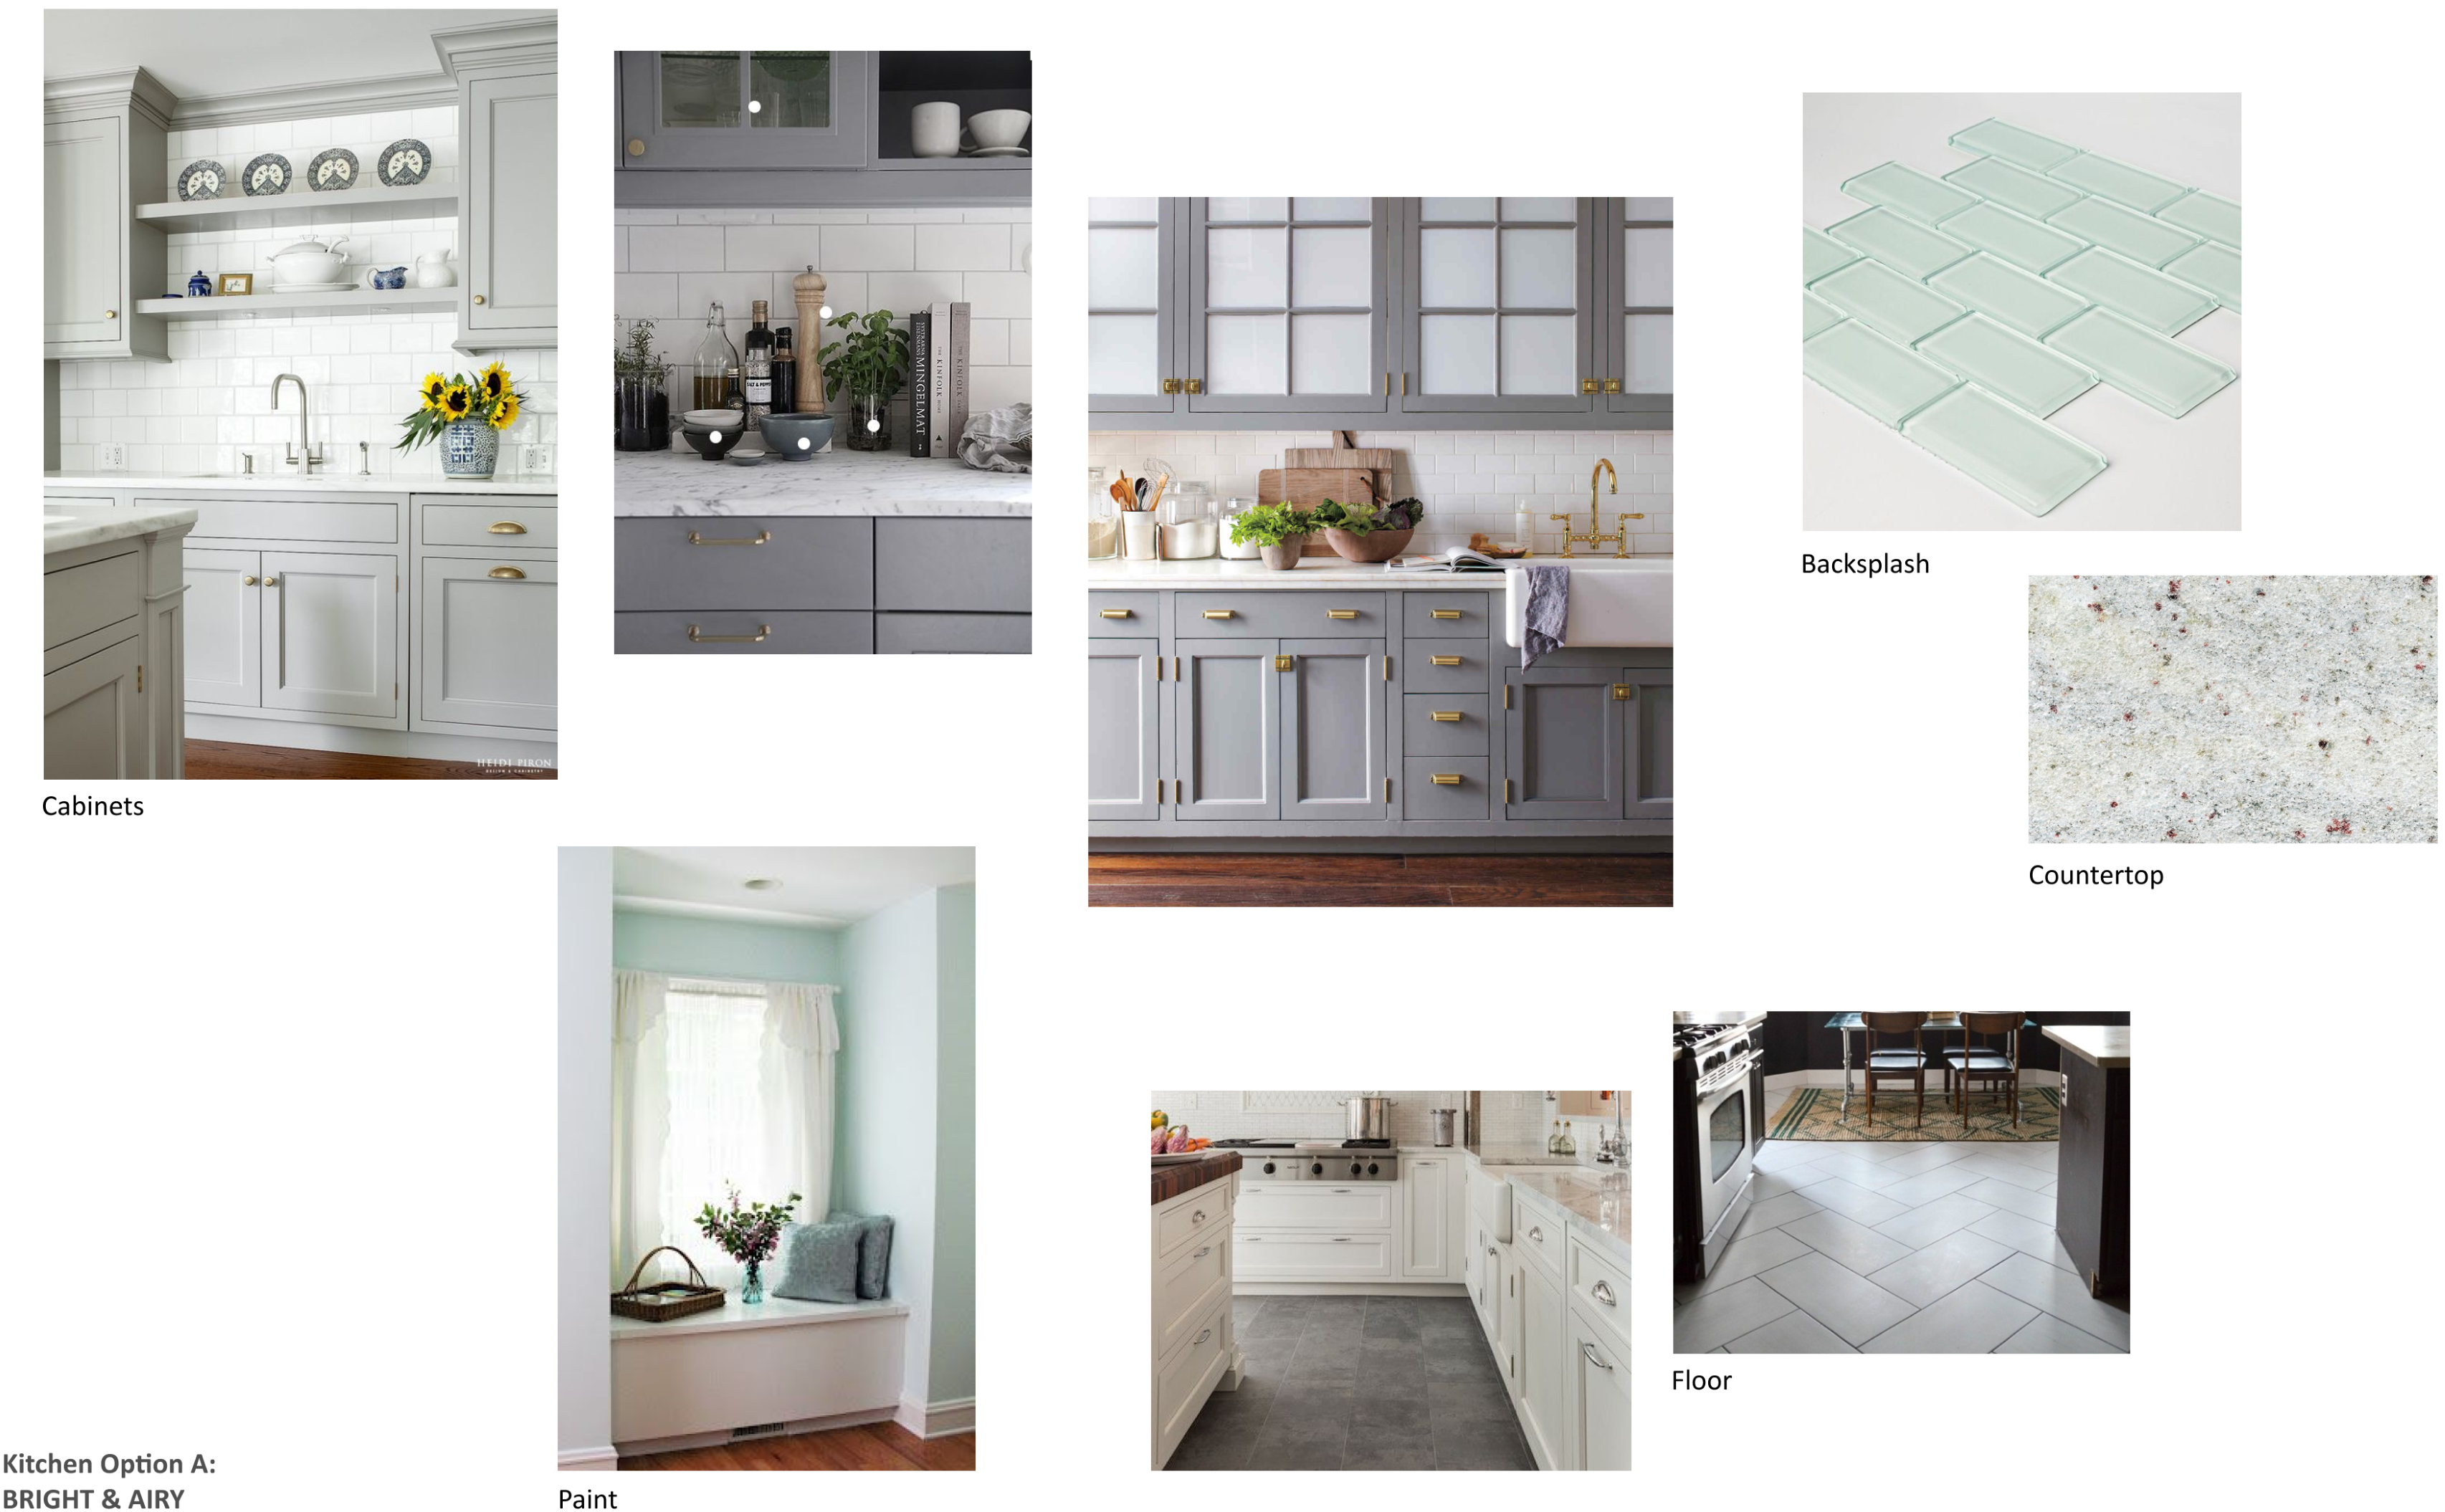
4) Finish/Feel Boards
The next step was to gather some inspiration images of kitchens and materials based on what I think would work in the space. Below are two options for the look and feel which I showed the client and they were immediately drawn to the clean lines and minimalist look of Option B.
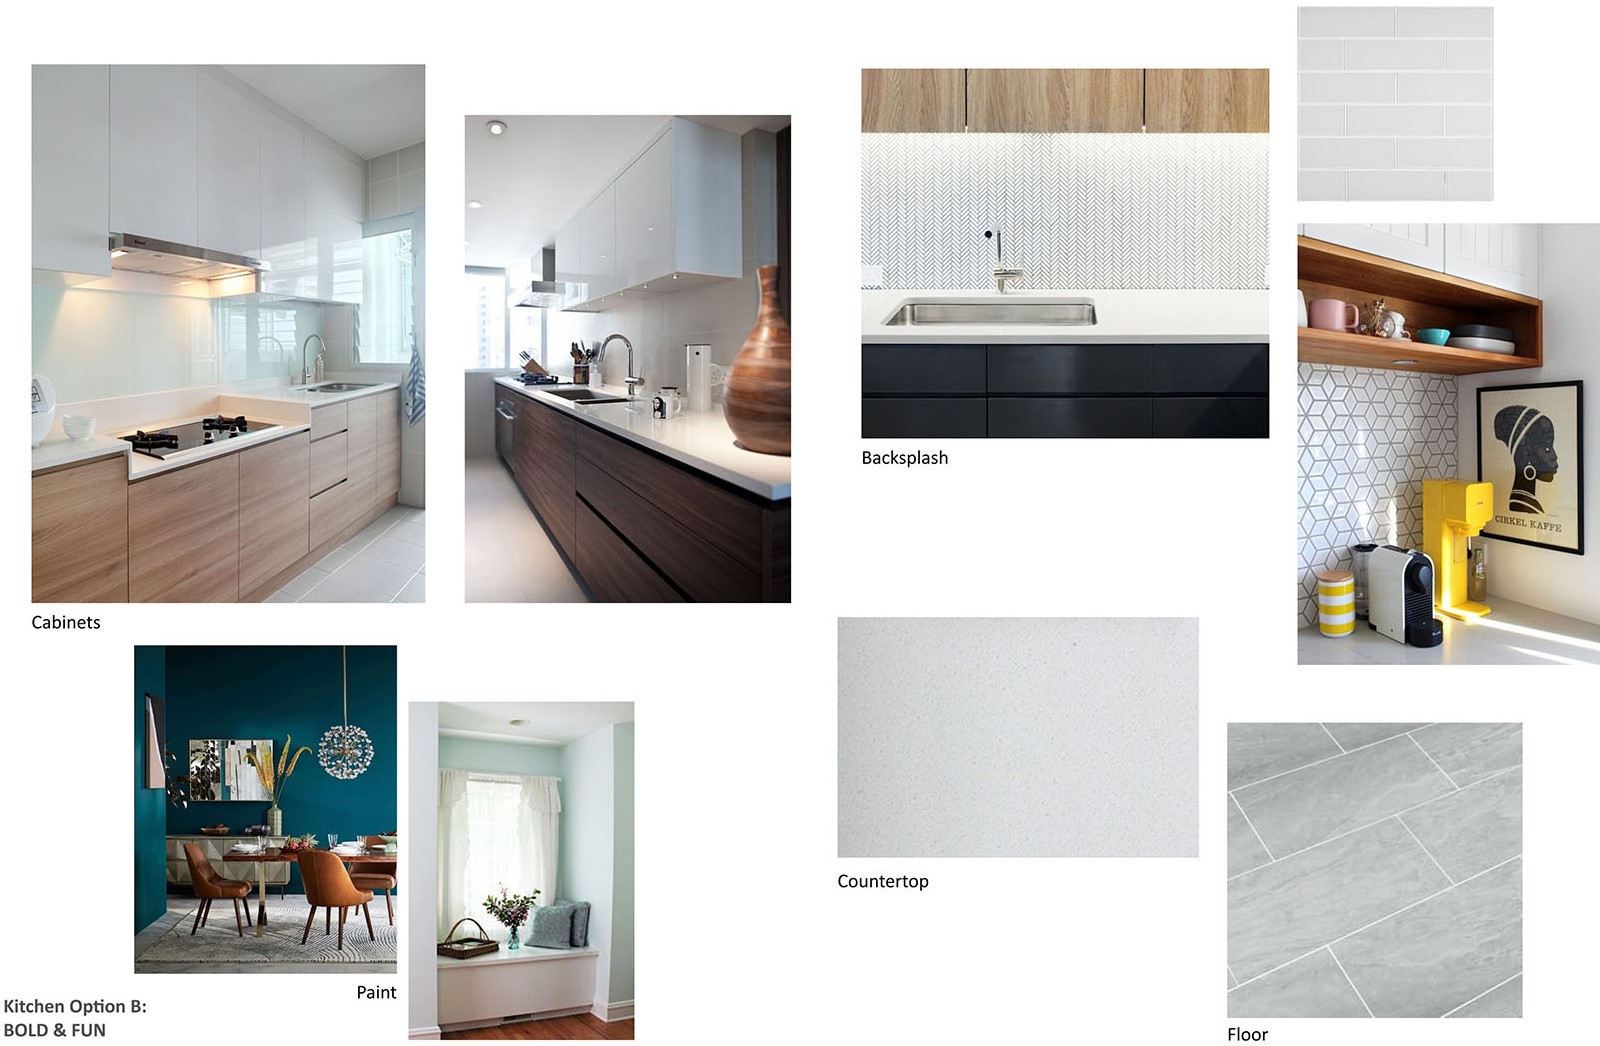
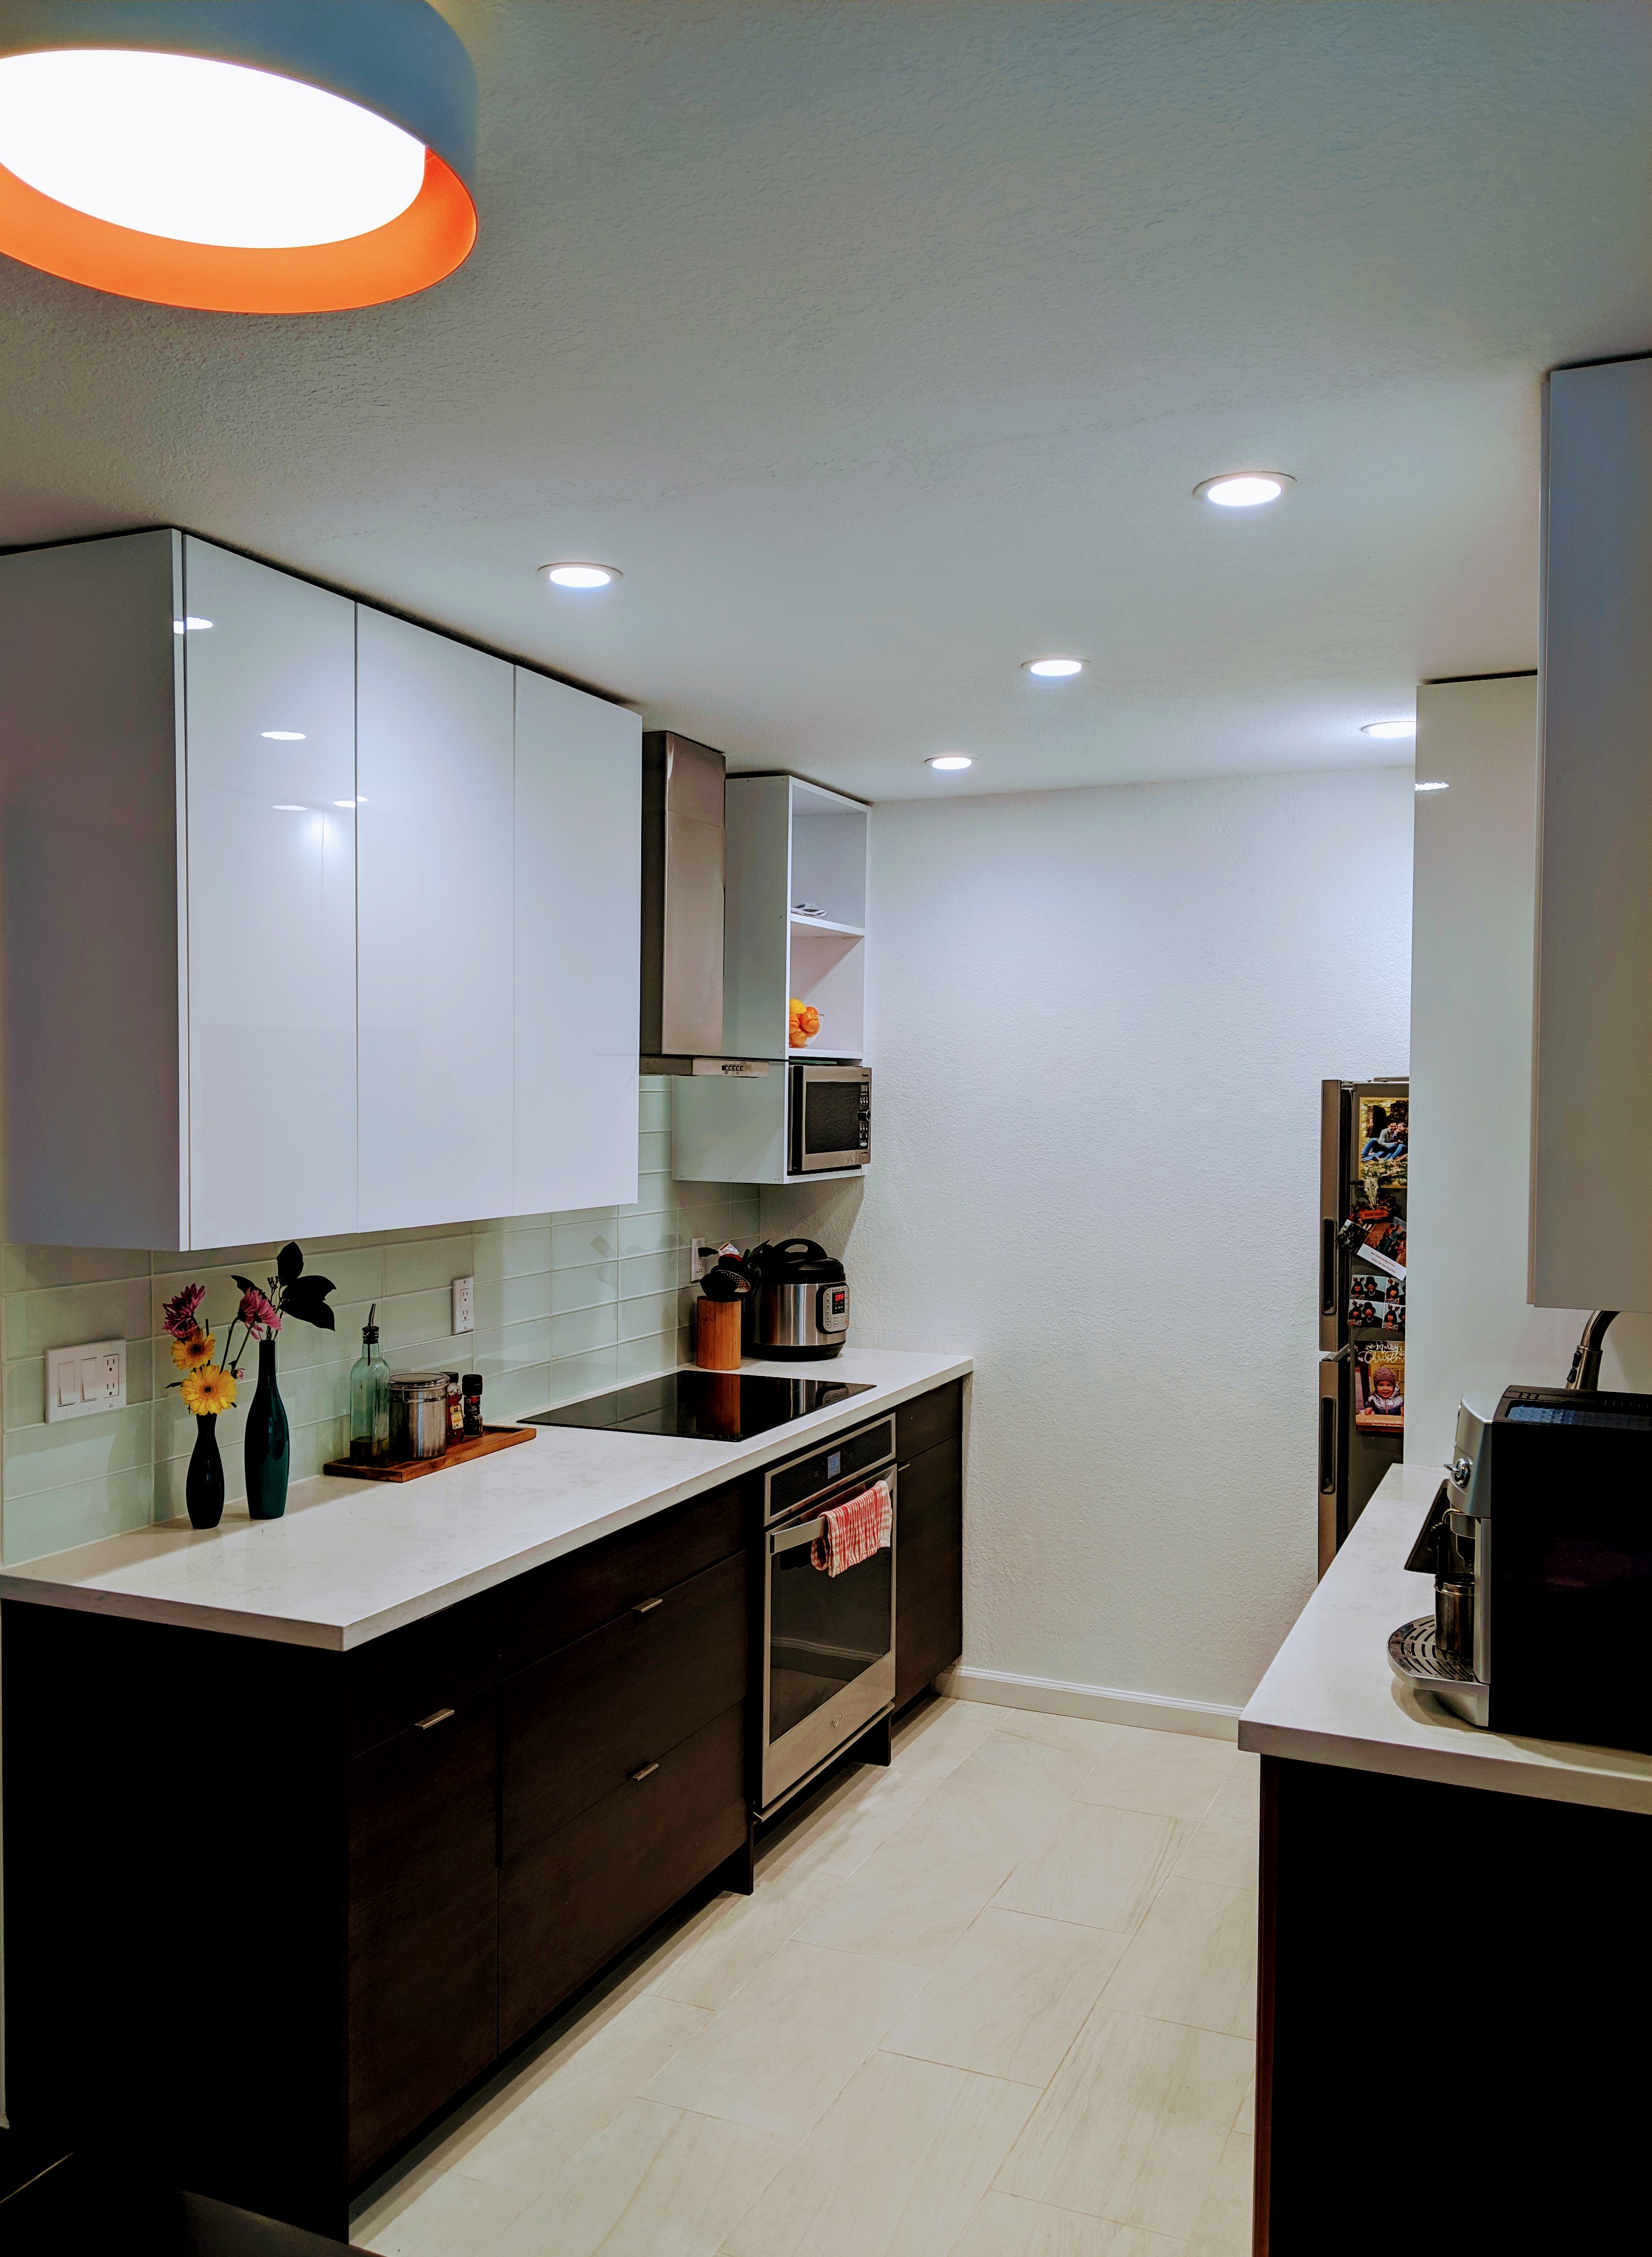
As you saw in the "Before" photos above there wasn’t a lot of space nor natural light in her kitchen so keeping it bright and minimalist was a great choice on her part and you’ll see the drastic difference it has made when I share the more photos in the next post!
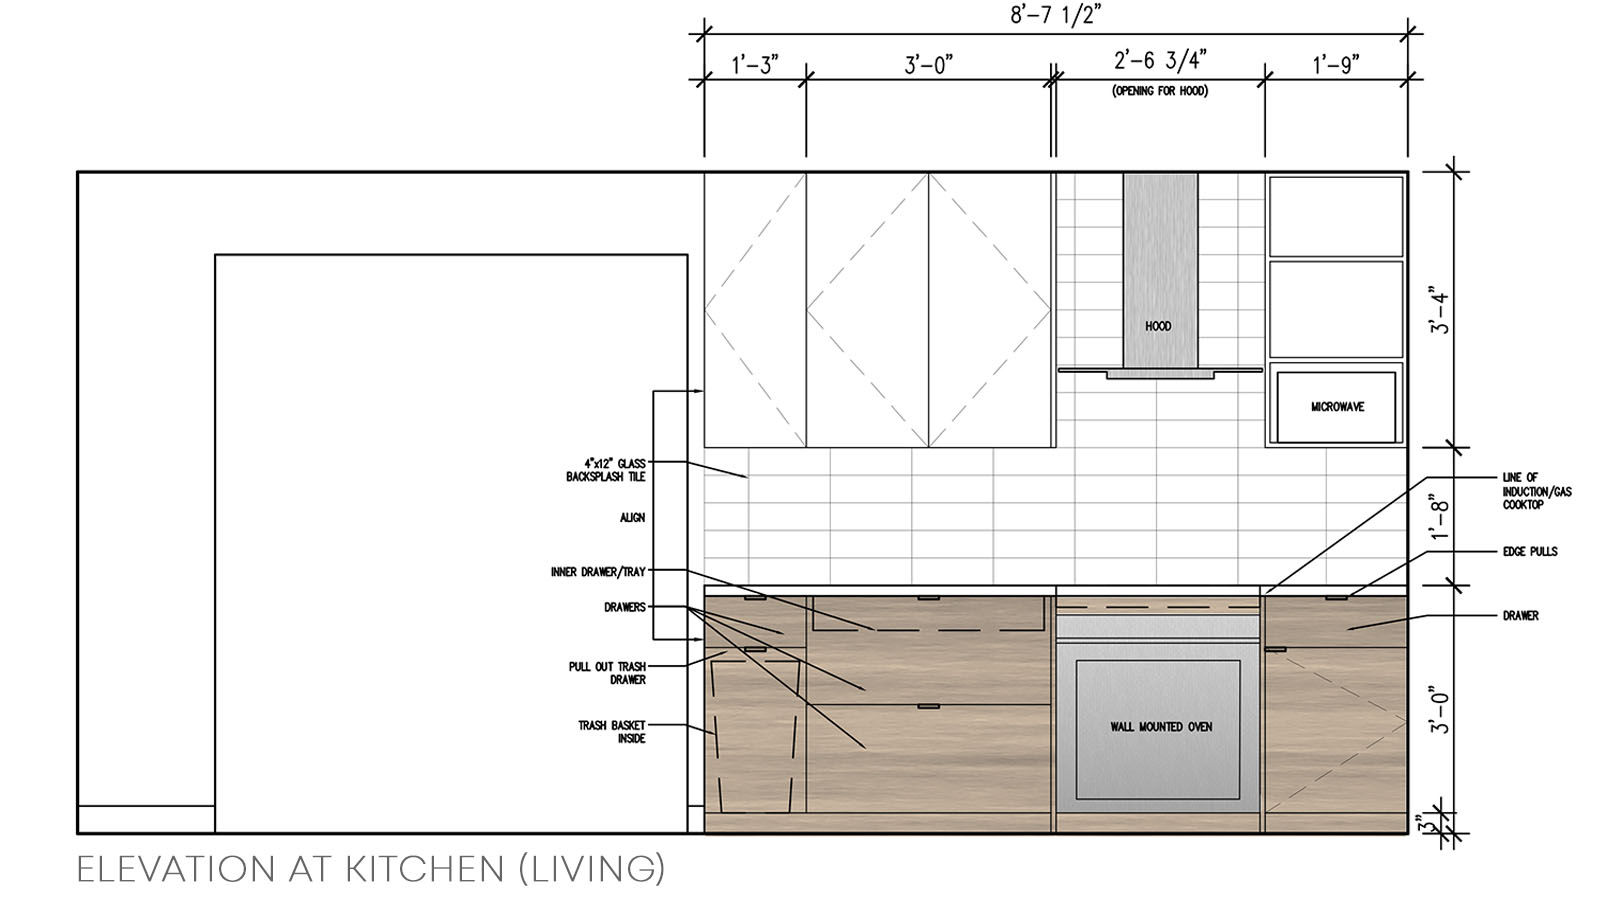
The design boards above and colored elevations below were not only helpful for the client to visualize the design as if she were standing in the new space but also a great guide for us while we shopped for cabinets and materials so we could pick the correct size and aesthetic for each item. A lot of furniture/materials look great in a store/online pics but choosing things that match the scale of your room makes a world of difference in the final look.
.jpeg)
I’ll stop this post here for now since it’s already pretty long! In my next post I’ll go into the details of how the new design solved the issues of the original kitchen along with tons of photos. Stay tuned for details of the paint colors, materials and appliances we chose in that post as well.
Let me know if these tips were helpful! Would you hire an interior designer for your next project?
.png)
.png)